I was always that kid that would return from a walk with my pockets overfull with treasures and my backpack the same. I suppose these deep embedded habits have led me to the desire to create and utilize the animal from our hunt in a variety of ways. The coyotes we kill in Southern Ontario with the hounds are no exception. The farm land where we hunt is greatly overpopulated causing a magnitude of issues for farmers , small game and deer hunters alike. Not one to waste anything, I have taken on the task of learning to turn the furs into beautiful garments.
In the last few years I have learned how to tan hides at home, start to finish and then create a variety of fur garments including mittens, hats and my most recent project, a coyote fur blanket. The blanket was a project I have been wanting to tackle for a long time but it was a daunting task with little to no clear instructions on the internet that I could find. It wasn’t until a friend came to me at bear camp and asked if I would be interested in putting together a coyote blanket for him using his collection of hides, that I decided to dive in head first and give it a go.
Thankfully the hides were previously prepped and tanned making my job much easier! Basic sewing skills with a machine will be needed but for the most part, just a lot of improvising. If you’re reading this, maybe sewing and DIY projects aren’t your thing. I’ll be honest, not many men I know would be caught dead at a sewing machine. So, two options, ask a lady in your life REALLY nice or embrace that feminine side and get to work. What could possibly be a more manly sewing project than sewing a fur blanket? Crack a beer and get to work, you won’t be disappointed when you’re wrapped up in the warmest blanket known to man.
The steps I took to create my blanket-
I began by laying out all my hides and getting an idea of sizing and colour variances. Ideally you would select a minimum of 6 hides all relatively the same size if possible and similar in colour. For this project, I would be working with 6 pelts with a pretty drastic size difference from largest to smallest, making my task of creating a uniform blanket a bit more challenging. Knowing what I know now, I would definitely aim for approximately 10-12 pelts.
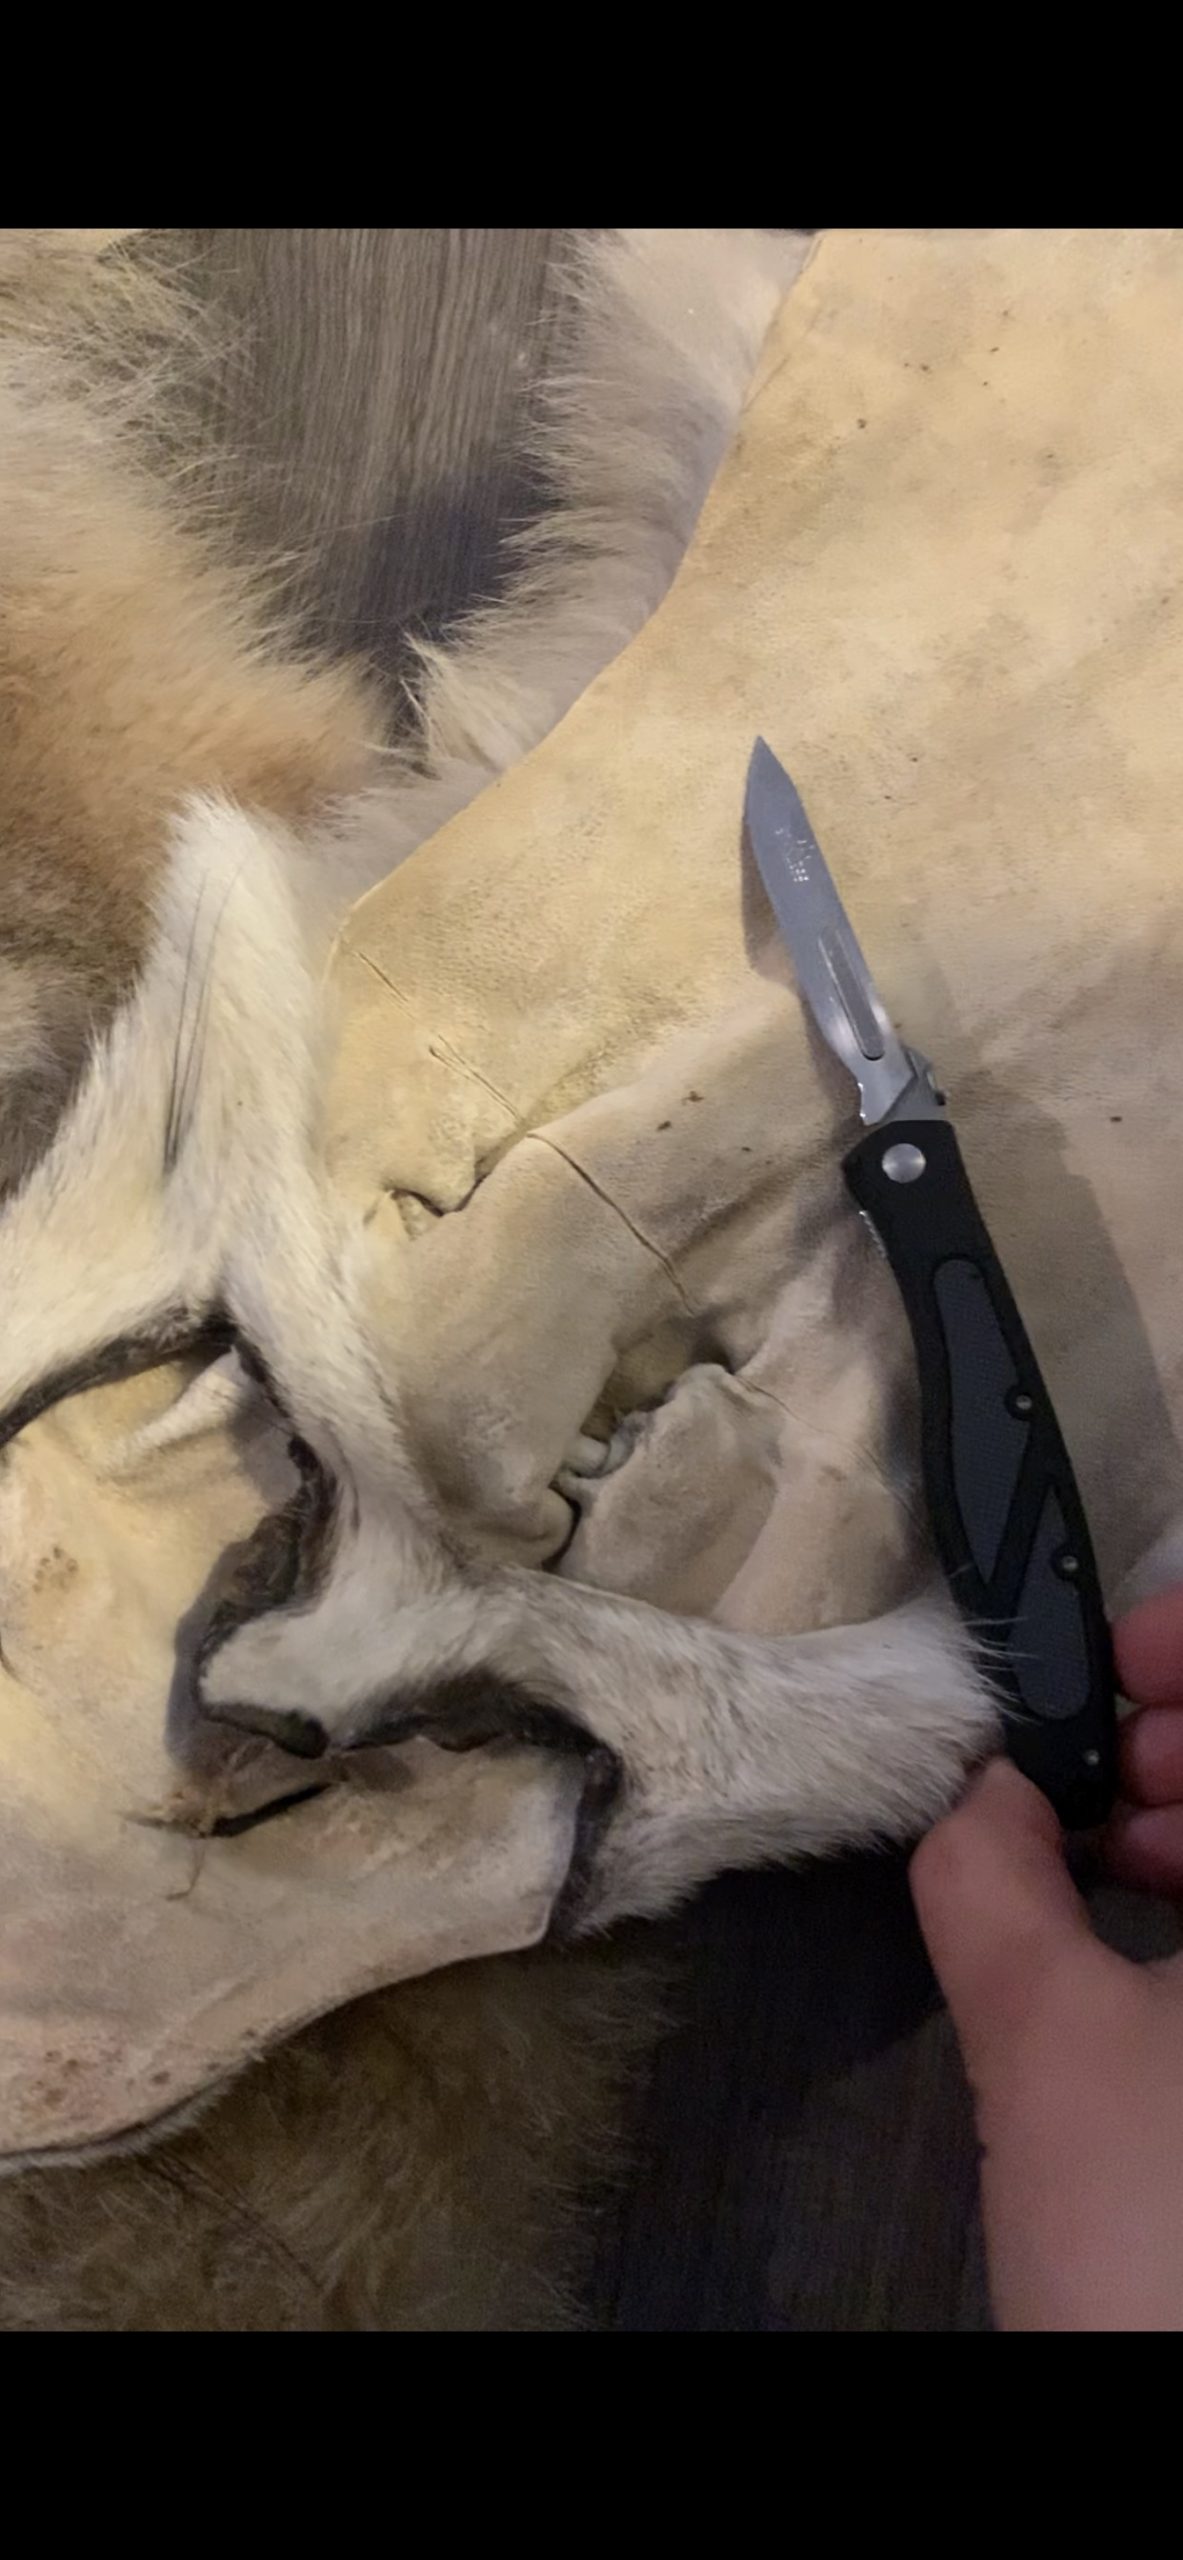
Our friend preferred that the faces and tails weren’t utilized in this particular blanket, so I carefully cut behind the ears and at the base of the tail and set them aside.
I then began arranging them in various positions to determine what would work best while utilizing as much of the hide as possible. With only 6 furs, I wanted to make the most of them to maximize the size of the blanket. I have seen many examples that will only use the back sections of the hides and cut them into perfect rectangles. This method would be much easier as you would just have to sew the panels together but would require more hides then I had to work with.
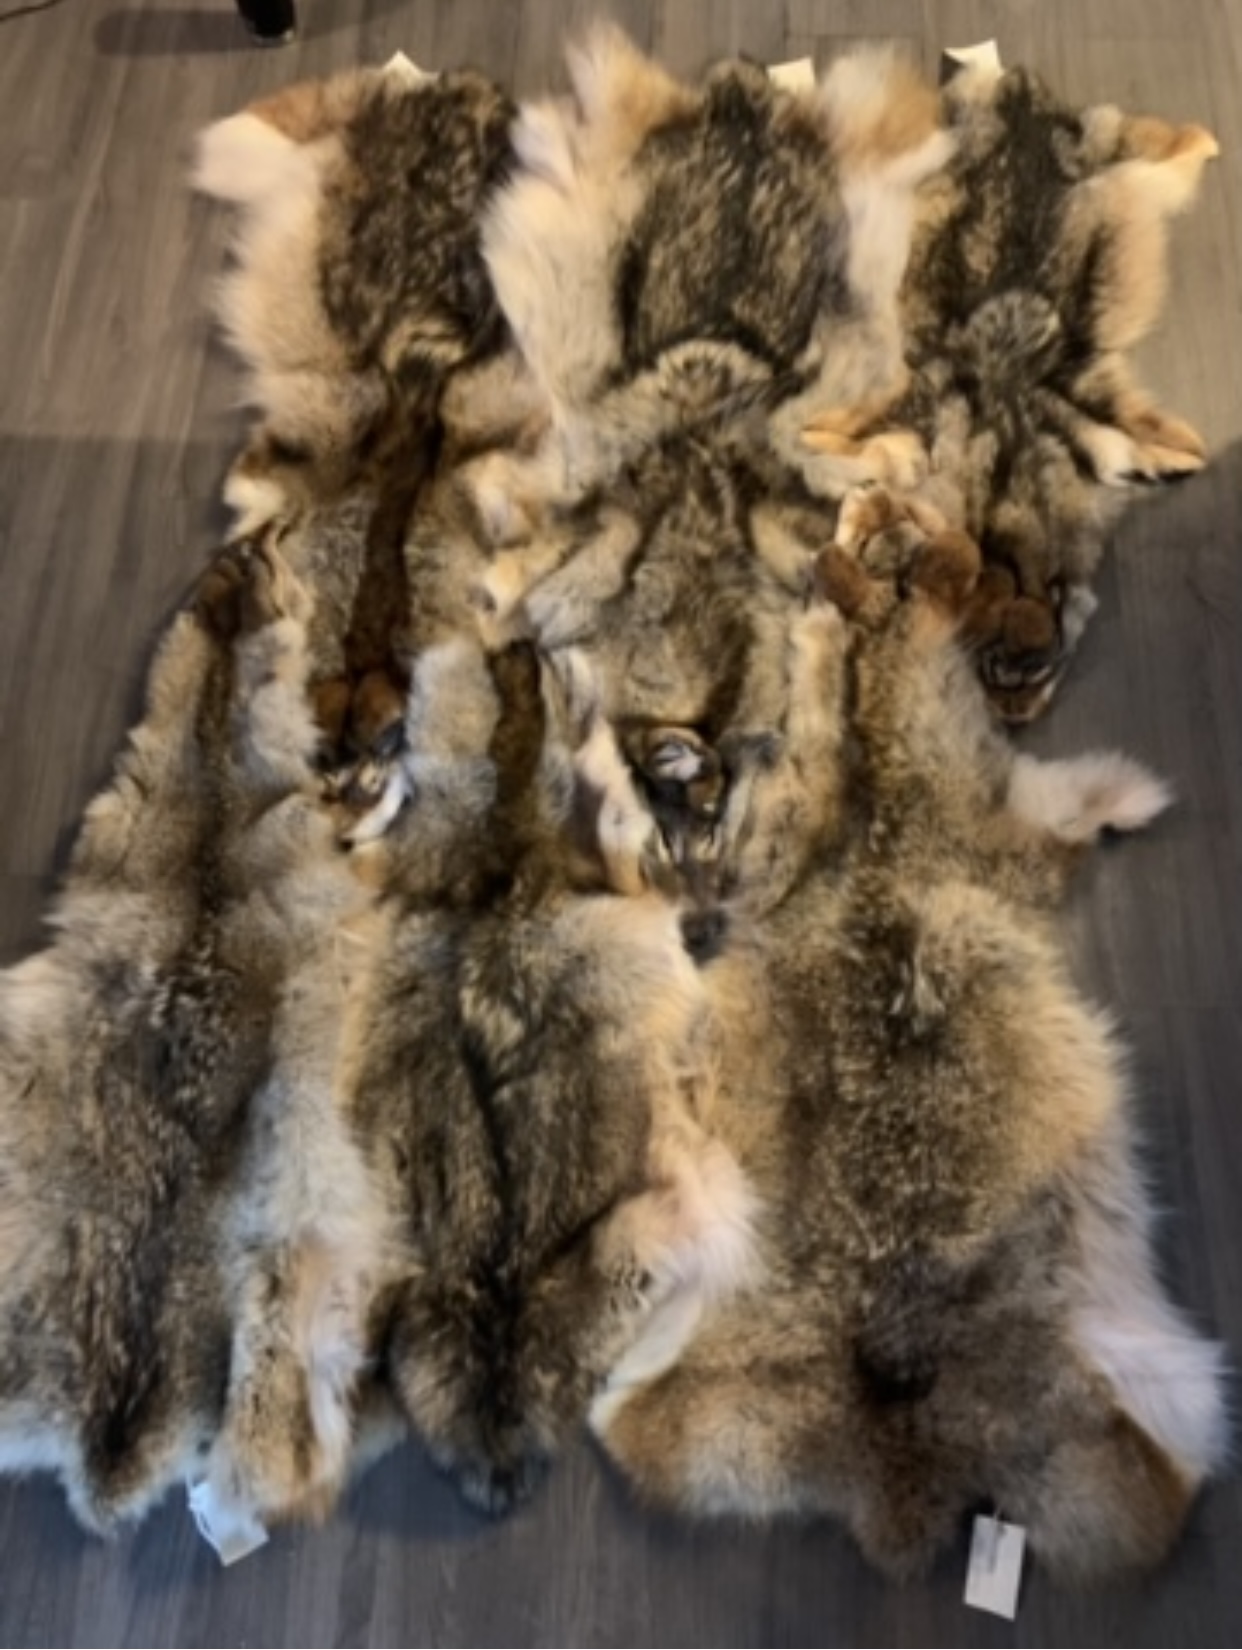
After rearranging them a variety of times, I opted to create a pattern allowing the furs to fit together quite snuggly. I arranged them in two rows of 3, alternating between neck up and neck down and then mirrored it on the opposite side.
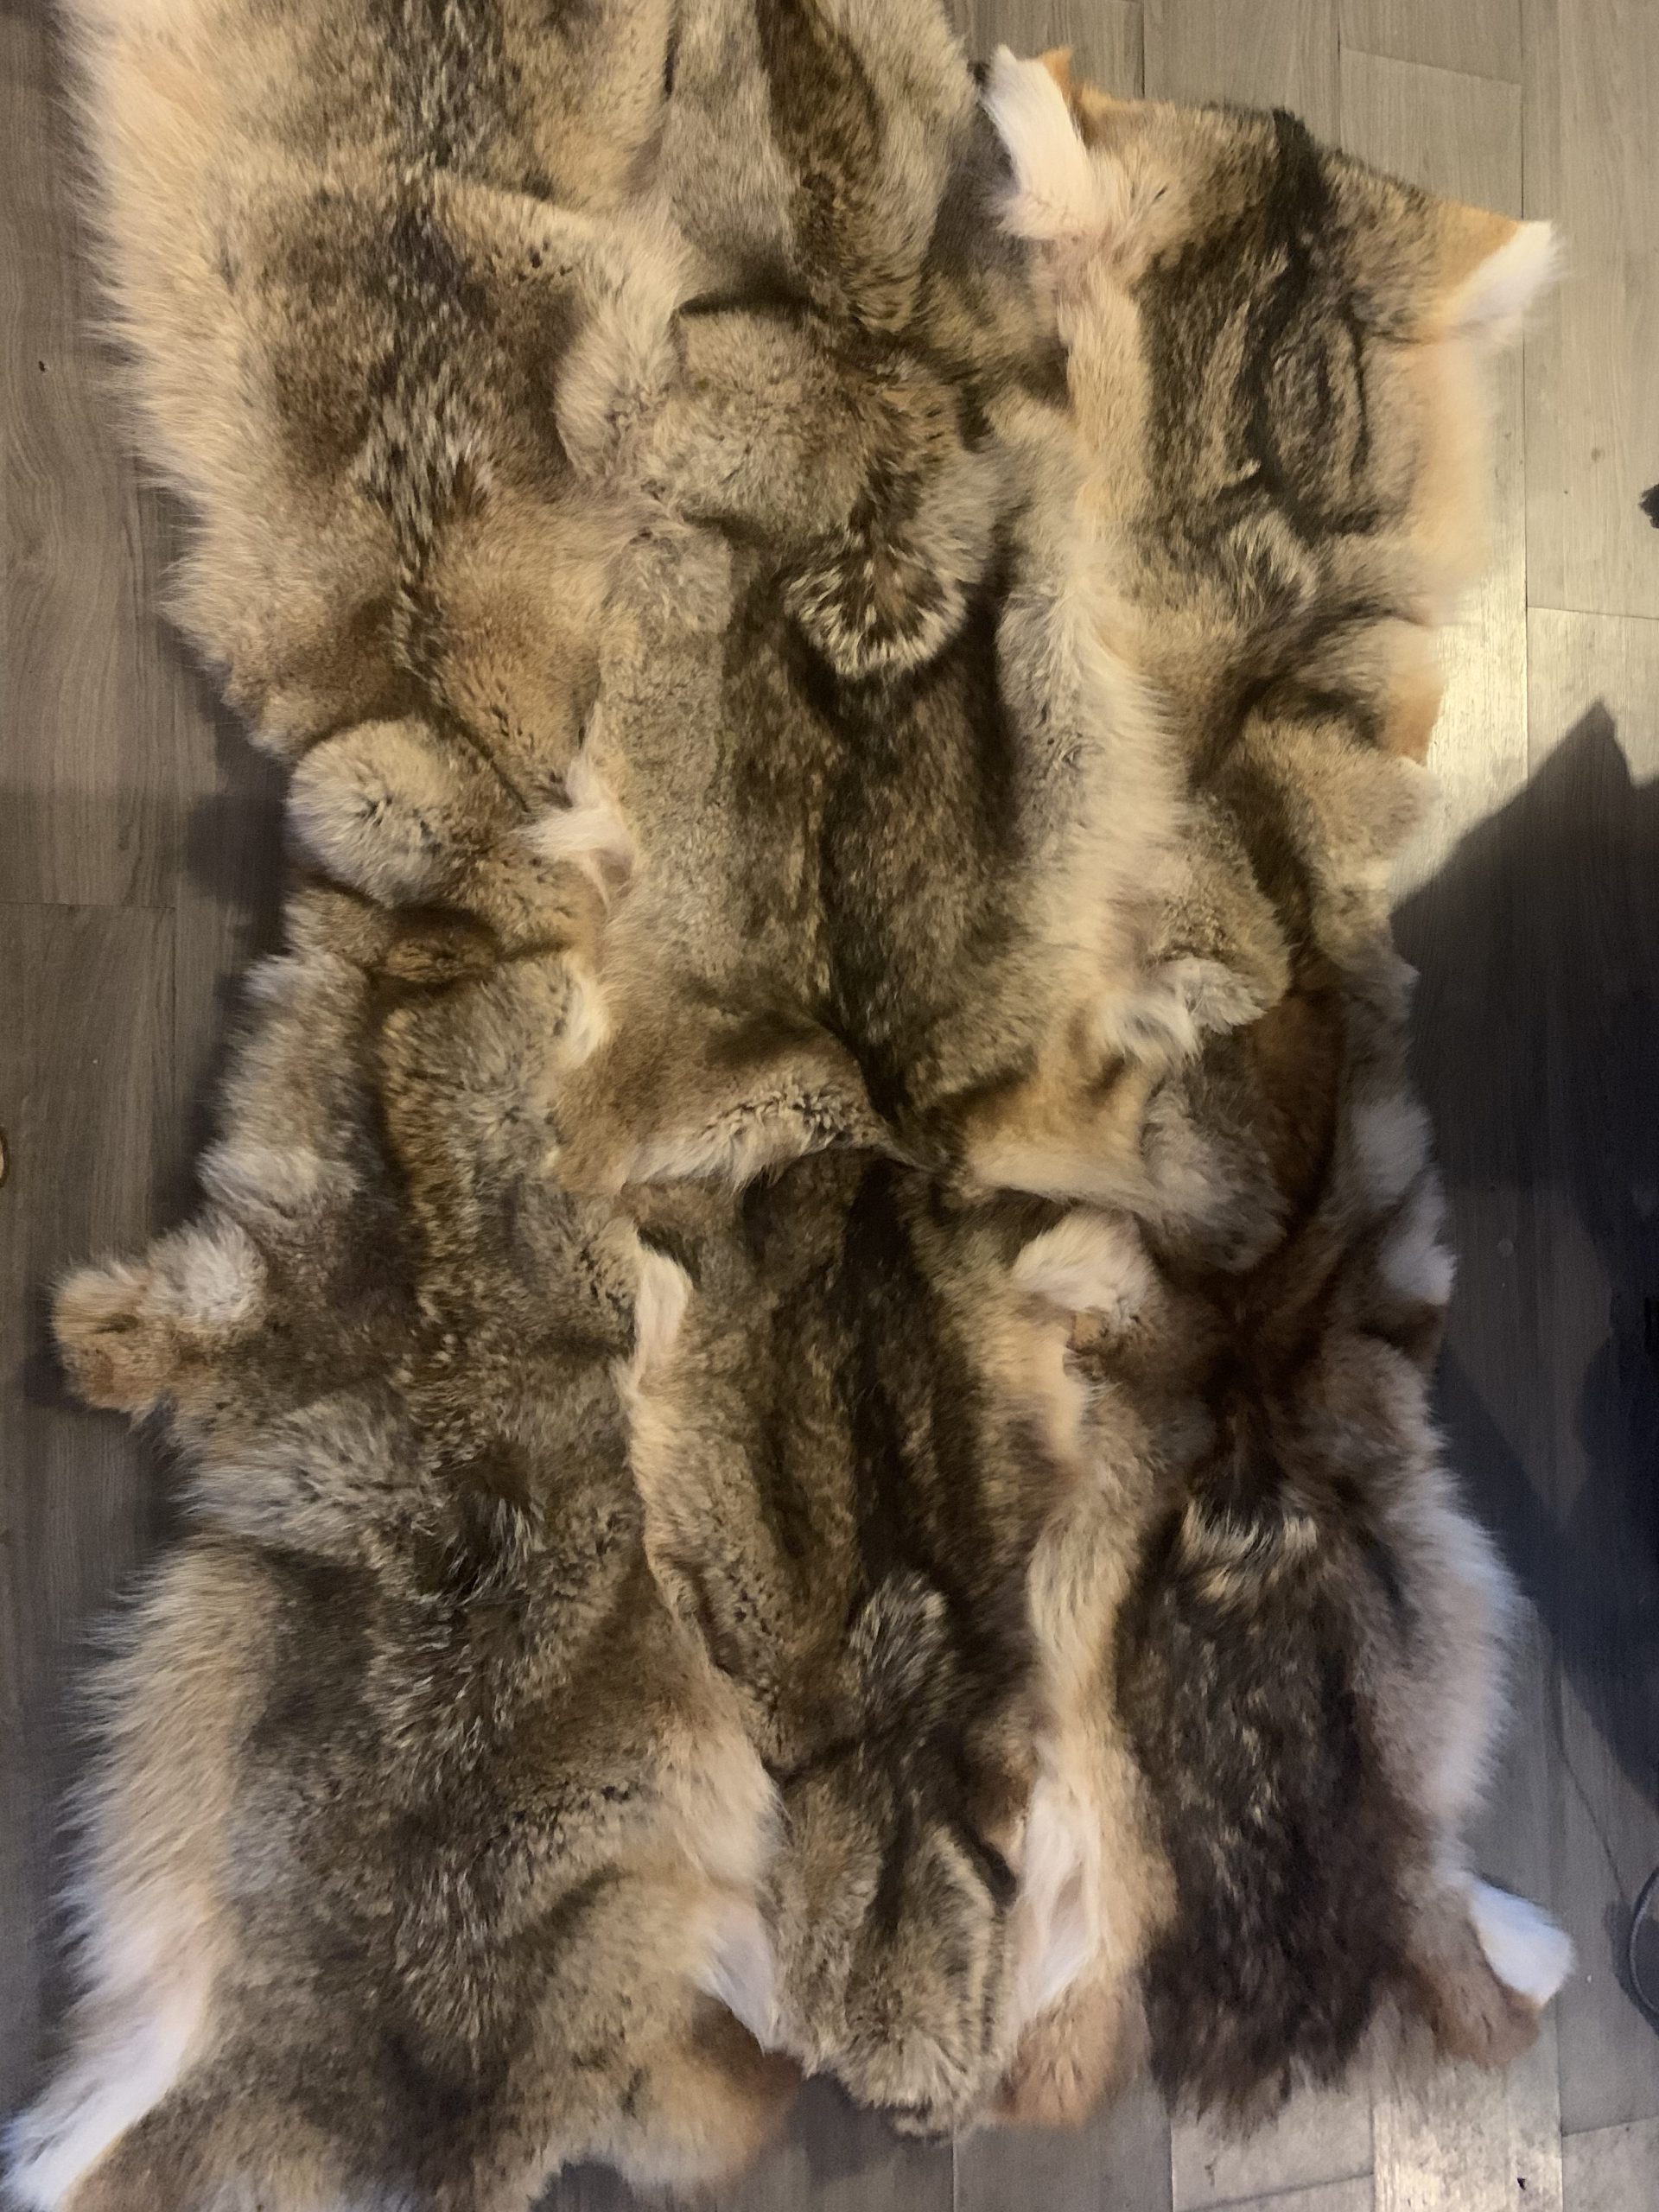
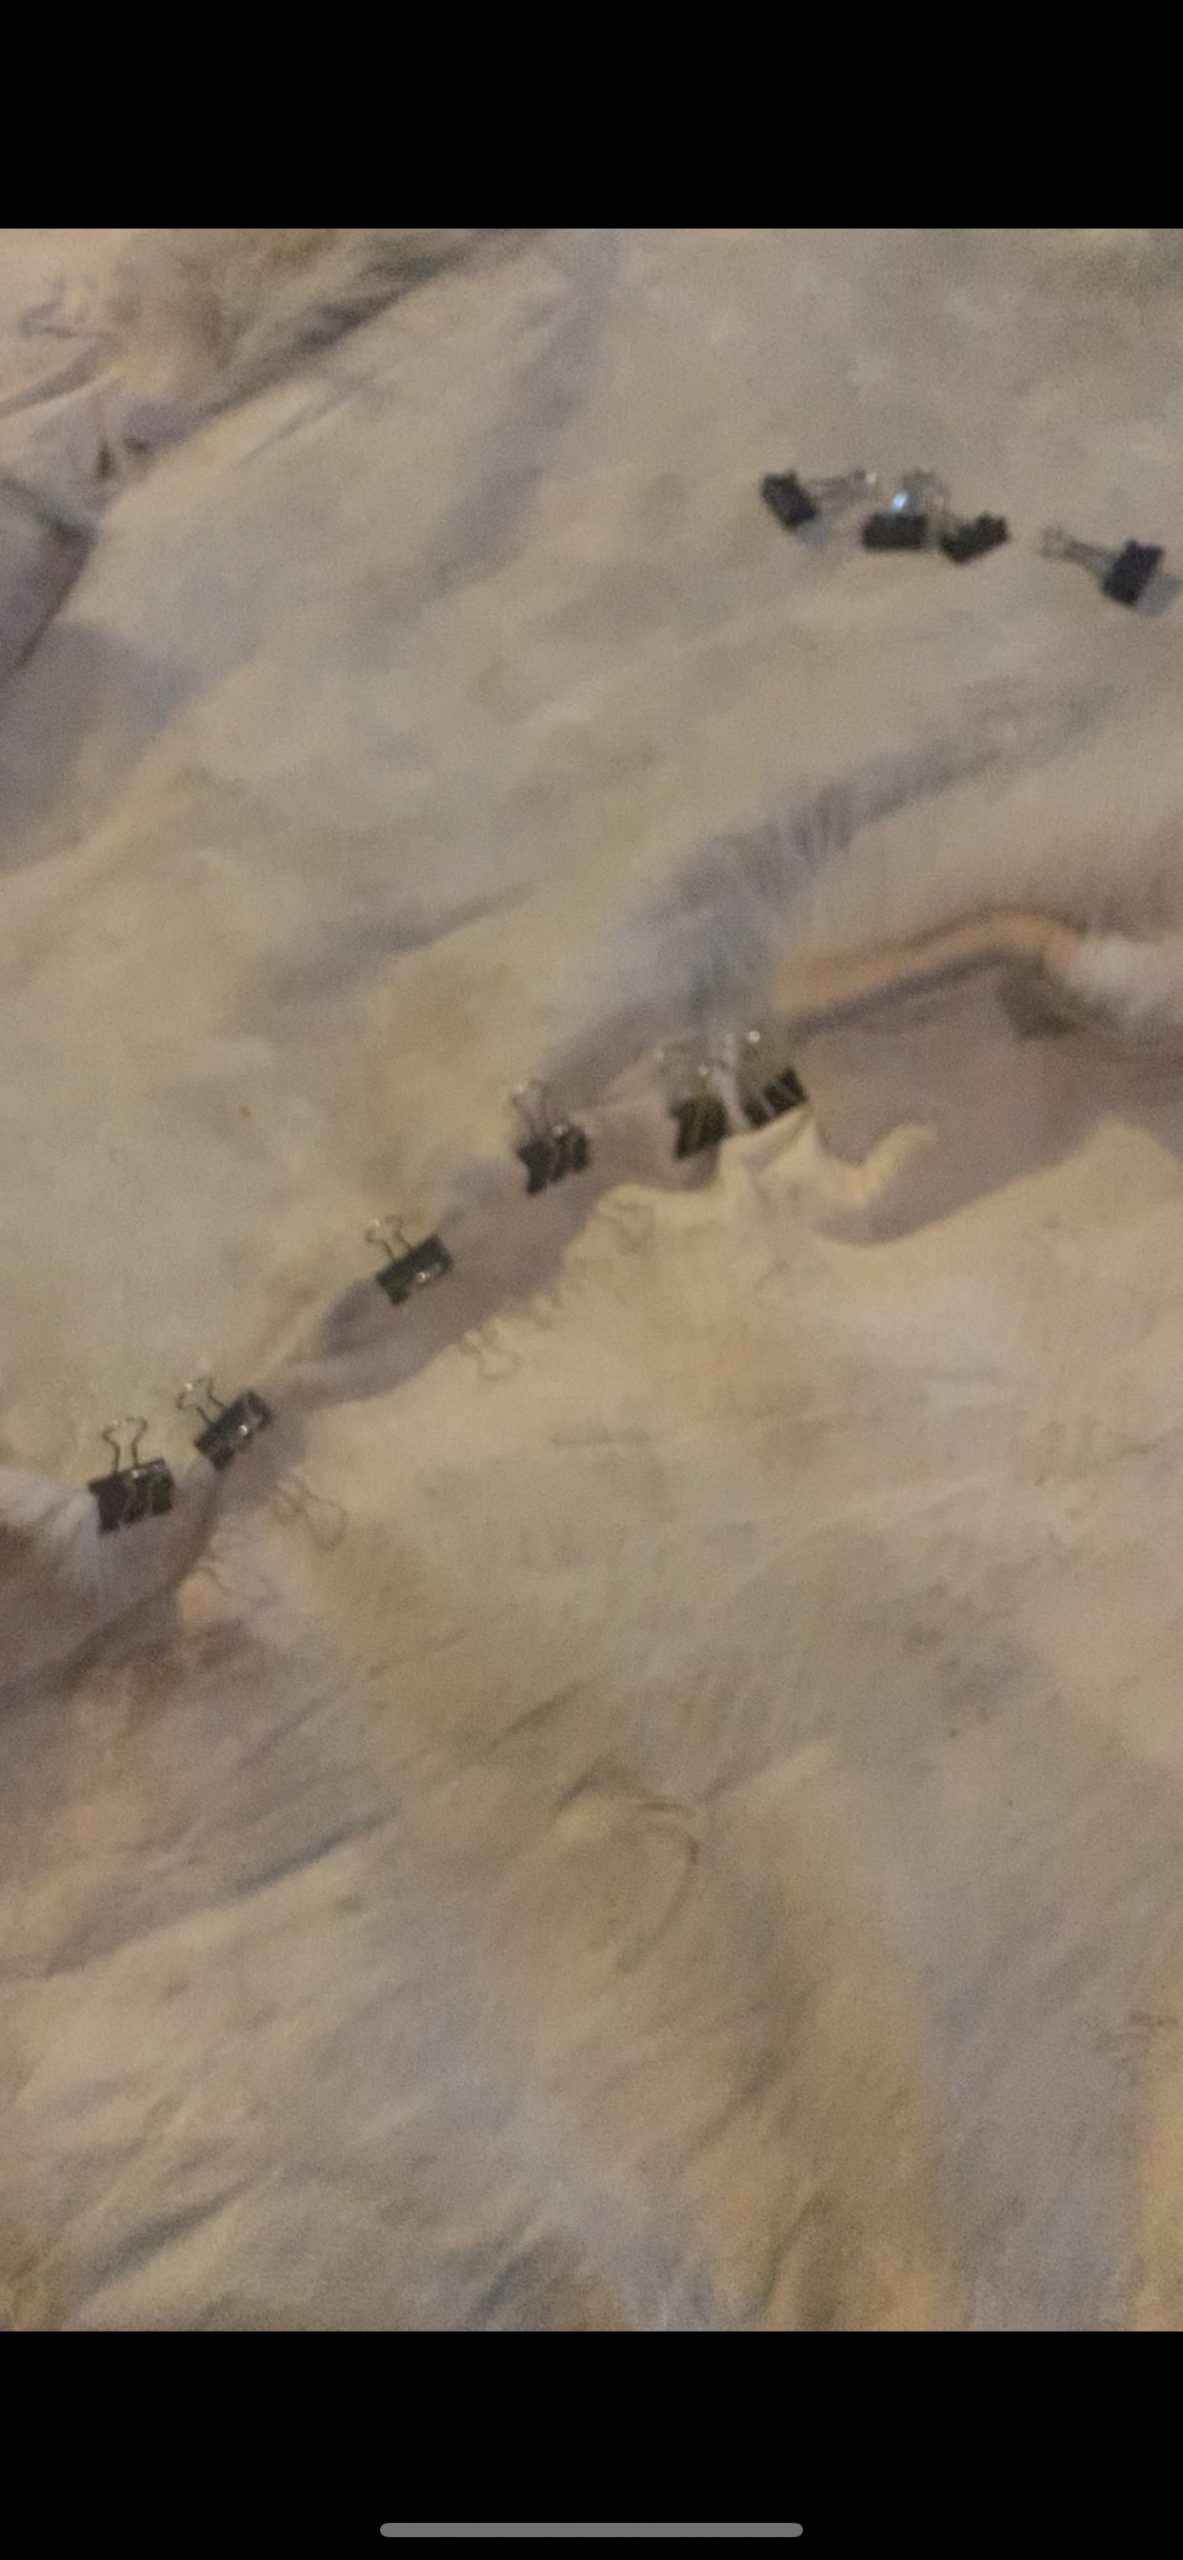
I then flipped them all over, ensuring the dark stripes along the neck would align with the adjacent hide. I used binder clips to hold the edges together instead of needles to minimize the amount of holes in the hide. It will take some time to figure out the best fit. Once I had settled on a layout, I set my machine to a larger straight stitch. You don’t want too tight of a stitch as it will rip through the hide. You will also need to use a heavy duty needle that you can purchase at most craft stores. Buy extra because if you are an amateur like me, you’ll snap a few before the project is done. If you don’t have a machine, I would recommend a sewing awl. This would give you a more rugged looking project but would be beautiful just the same.
Note: I recommend not cutting anything from the hides if possible until you are happy with the outcome after sewing everything together. Unless of course, you are cutting them into the rectangles.
I started by sewing one half of the blanket together. This is a slow, tedious project. You’ll notice that you are constantly battling fur but take your time and utilize the clips to keep everything in place as you sew. With the fur sides together, you’ll notice that everything tends to shift and slide so pay attention that everything remains aligned.
Continue adding a piece at the time and be sure to lay out your blanket flat to make sure it’s all sitting properly.
Once everything is stitched together, ensure everything is laying relatively flat, and that you don’t miss any sections. Once you’re happy, you can then begin trimming any excess or shaping the edges as you desire. For mine, I left the natural curves of the hides.
There you have it. An authentic coyote blanket. An optional step would be to add a fabric of your choice to the back which I’ll be doing soon!
If you have any questions don’t hesitate to reach out, I would be happy to help!
By Chelsea Hansler
Instagram @chelseahansler
If you have hunting dogs and find yourself in a similar situation regarding coyote trouble, check out these products: